A Beginner's Guide to Snowshoeing

I’m a born-and-raised Virginian, and while Virginia definitely gets snow, I never found myself in situations where I needed snowshoes to go on a hike (not to mention the snow tends to melt pretty fast so it’s never around for a long time). Now that I’m a resident of Oregon, I have access to A LOT of real snow all winter long! Before we ever moved to Oregon, I knew I wanted to try as many fun outdoor, snowy activities that I could, but being a mid-Atlantic east coaster meant I had a LOT of learning to do. Snowshoeing was the one thing I was most excited to try, and I did a lot of research to find the right gear and learn about safety during the wintertime.
Before diving into this guide, I want to really stress that I am NOT an expert and this is simply a beginners guide with very general information… I’m a novice, a beginner, and an excited beginner at that. Be sure to take time to educate yourself, ask experts for advice and take an avalanche safety course before heading outdoors during the winter! With that being said, let's dive into what I found while researching snowshoeing!
THE BASICS
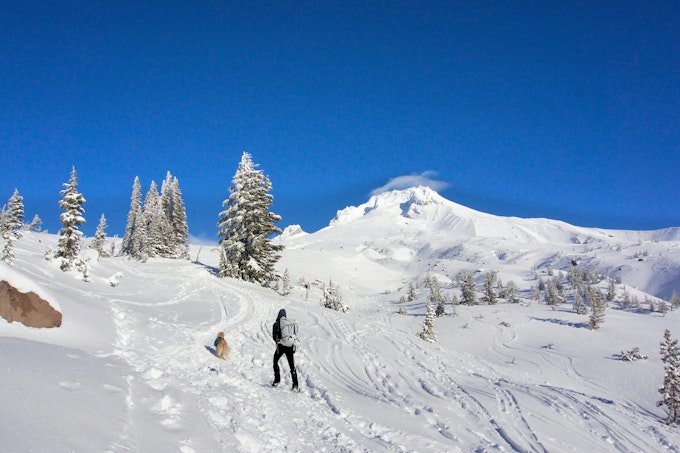
Snowshoeing is essentially hiking in the snow; if you can walk, you can snowshoe! Snowshoes help distribute your weight and therefore keep you from sinking deep into snow. For your first time snowshoeing you should choose a relatively flat, easy trail to get the hang of it. However, the first time I went I hiked up the side of Mount Hood and it was far from easy (lesson learned!). If you are a smaller person or have narrow hips, your stance will need to be wider than normal to avoid stepping on your snowshoes. This may cause you to use muscles you don’t normally use and you might be sore afterwards!
The type of snow will determine how you walk up or down a slope. Some snow can be packed down and hard, some snow will be light and fluffy. I found that stepping up with my toes and creating a sort of "step" was the best way to tackle uphills. Use your best judgement to get a feel for whatever condition you find yourself in. If you’re sinking too far down into the snow or slipping up a slope, find a better path! I highly recommend trekking poles as extra points of contact and to make downhills easier/less dangerous. For longer uphill climbs you can flip up your heel lift (or climbing bar) up on the snowshoes to make it more comfortable for your legs and feet. While going downhill, keep your poles in front of you and make sure your legs are slightly bent. If you have heel crampons, you can shift your weight to your heels, but if you only have toe crampons you’ll need to make sure your toe crampon is planted firmly and distribute your weight over your whole foot (not putting too much weight into your heels). Walking in snowshoes might feel awkward at first, but give yourself a few minutes to get the hang of it and you'll fall into a comfortable tempo.
While in the backcountry, try to make your own trail if you are sharing a trail with cross-country skiers. Skiers have the right-of-way since it’s easier for people who are snowshoeing to step off the trail. For your first few times out in the snow, stick to established trails in ski areas so you’re never too far away from emergency personnel, know the trail you are on is safe, and have a smaller chance of encountering an avalanche.
As always, use your best judgement in all situations. If you have a bad gut feeling about a route, feel uneasy due to approaching weather or are simply having an "off" day, turn around. There are always going to be more opportunities to try again and it simply isn't worth risking your safety.
THE GEAR
SNOWSHOES: I went with a pair of rolling terrain snowshoes because I knew I would need more aggressive crampons for the type of hiking I’d be doing in Oregon and needed something a little more than flat terrain snowshoes.
- Flat Terrain Snowshoes (for beginners and used for flat terrain or rolling hills)
- Rolling Terrain Snowshoes (for hikers and backpackers and better if uphills are a little bit steeper)
- Mountain Terrain Snowshoes (for advanced mountaineers or super icy/steep conditions)
It's easy to see why type of terrain a pair of snowshoes is designed for on REI's website. Just scroll down and look at the "Technical Specs" section.
POLES: As mentioned above, poles are super useful as extra points of contact. If you’re on relatively flat ground you can go without them, but if there is going to be any uphill or downhill sections of the trail, I highly recommend at least bringing them in case you need them.
BOOTS: You’ll need waterproof boots to protect your feet and keep them dry during your adventure. I also like to wear a pair of moisture-wicking wool hiking socks to keep my feet extra comfy.
GAITERS: Gaiters help prevent snow from getting into your hiking boots.
LAYERS: This point also plays into safety as you always want to have enough layers and the right clothing to keep you warm and more importantly, dry. Even if no inclement weather is in the forecast, pack extra layers like you’re expecting it anyways. I pack
- Two base layers (I always wear at least one base layer that’s moisture wicking and insulating, I have a second packed in case it’s colder than anticipated)
- Two mid-layers. For me this is usually a fuzzy pullover or some other soft, insulating layer and then a puffy jacket.
- An outer layer. This is always a thick, waterproof jacket.
- Gloves, hats, neck warmers; I have two pairs of gloves I bring (one thin one thick), a thick beanie and two different thicknesses of neck warmers.
DAY PACK: While snowshoeing you may need to upgrade your normal daypack size to accommodate extra layers, emergency equipment, food and water. Pack your backpack well in advance with all the gear you may need and layers you anticipate shedding while on your hike to make sure everything fits. If not, invest in a bigger backpack. Do not forgo gear that you may need while out in the snow!
CHANGE OF DRY CLOTHES (OPTIONAL): I also like to have a dry change of clothes in the car for after the hike, if nothing else, an extra shirt, pair of socks and warm comfy pants in case I get wet.
TEN ESSENTIALS: Navigation (map, compass, GPS, etc.), sun protection (sunscreen, chapstick, sunglasses to protect eyes from sunburn in the snow), insulation (see layers above), light (headlamp or flashlight and extra batteries), first aid kit, fire starter, repair kit and tools (duck tape, knife and snowshoe specific repair kit), food, water, and emergency shelter
SAFETY
- Tell someone where you are going.
- Do not snowshoe alone.
- Stick to established trails.
- Listen to your gut and to your body: turn around if you feel you may be in danger.
- Learn about hazards associated with traveling in the backcountry during the winter time prior to heading outdoors.
- Stay hydrated: staying hydrated helps fend off hypothermia, keeps your muscles from aching and so much more.
- Take an avalanche safety course before heading out in the snow.
Have fun and be safe!!